 NomadSwipe
How to save places on Google Maps, step by step
To save a place on Google Maps, open it, tap its name or address at the bottom, tap Save and choose a list. The steps are the same on Android and iPhone, and your saved places then live under the You tab.
The 8 steps for Android and iPhone
-
Sign in to your Google Account.
Google Maps Help says to make sure you are signed in if you want to save and find favorite places. Signing in also means your saved places show up on any computer, phone or tablet where you use the same account.
-
Find the place.
Search for it by name, tap a marker on the map, or touch and hold a spot on the map. The last option is handy for an address with no name, such as a flat you rented.
-
Tap the name or address, then Save.
At the bottom of the screen, tap the place's name or address, tap Save, and choose a list. That is the whole save. Only you can find your saved places unless you create and share a list.
-
Make one list per trip.
Tap You, then New list, and enter a name and a description. On Android you also pick a list type, Private (only you can view and edit) or Shared (a link to view or edit), then tap Save at the top right. On iPhone, tap Save at the top right after the name and description. A name like "Lisbon, November" keeps a trip apart from your everyday places.
To save a place to the new list straight away, tap New list in the Save sheet from step 3.
-
Use the default lists as a rough "want to go" shortlist.
Google Maps comes with default lists named Favorites, Want to go, Starred places, Labeled and Travel plans. The help page names them when it says their icons cannot be changed. If you only need one pile of maybes, save to Want to go. If you want a trip kept apart, use the list from step 4. You can also change the icon of your own lists: next to the list tap More, then Edit list, then Edit icon.
-
Label addresses with no name.
A private label puts a name of your choice on a place. Search for an address, or touch and hold a spot on the map, tap the place's name at the bottom, then tap Label. For a business, open its page and tap More, then Add label. Labeled places show on your map and in search suggestions. To see them again, tap You, then Labeled.
-
Add a note to a saved place (iPhone page).
The iPhone and iPad help page lists this: tap You, select a list, choose a place, tap Add a note about this place, write the note and tap Save. Notes can be up to 4,000 characters. The Android page I read did not list the steps, so check what your version shows. A note is the place to put an opening day, a booking number or "ask for the terrace".
-
Find the places later.
- By list: tap You, then pick a list under Your lists.
- By name (Android page): tap You, then See all, then Search at the top left under Your places, type the place name or your note, and pick the best match.
- By recency or distance (Android page): under You, Recently saved shows places added in the last few months and Nearby saved shows saved places within 25 km (about 16 miles) of you.
- On the map: next to a list tap More, then choose Hide on your map or Show on your map to control whether its places appear on the main map.
On Android you can also save several of your recent places to a list at once: tap You, then See all, touch and hold a place, tick the others, tap Save and choose a list.
What saved places look like on the map
Saved places are not a separate screen. The help pages describe the places on a list as appearing on your main map, and each list has a Hide on your map or Show on your map switch behind its More menu. The same page says that if you save a list someone else made, its places also appear on your main map unless you hide the list. So the main map can fill up fast. Hide the lists you are not using before you plan a trip, so the map shows one city's places and not everything you have saved since you first opened the app.
The limits people hit when saving places for a whole trip
Saving works well for "I want to remember this café." A trip asks more of it. The table lists each planning need, what the Google Maps Help pages I read say, and the workaround. Where the pages were silent, the cell says so, and that is not proof the feature is missing.
| Planning need | What the help pages say | Workaround |
|---|---|---|
| Keep one trip's places together | You can make your own named lists. Default lists include Favorites, Want to go, Starred places, Labeled and Travel plans. | One list per trip, named with the city and month. |
| See only this trip on the map | Each list can be hidden or shown on the main map. Lists saved from other people also appear unless hidden. | Hide every list except the trip's before you open the map. |
| Group places by day | The pages I read describe lists, not a day-by-day view. | One list per day, or one note per place saying which day. |
| Put places in a set order | The Android page describes Customize list order: turn it on, then touch and hold the four blue lines next to a place and drag. The iPhone page I read did not list this. | Use it on Android. On iPhone, number the places in their notes. |
| Use the trip with no signal | Saving a place is different from downloading an offline area, says the Save favorite places page. | Download the city's area as well, and check what it covers before you leave Wi-Fi. |
| Very long lists | Saved lists are limited to 3,000 entries, and longer lists may not display properly. | A single trip will not reach that, but a list used for years can. |
| Opening hours and decisions | The pages I read describe saving and finding places, not choosing between them. | Cut the list yourself before the trip, and check each place's hours the day before. |
The pattern is that Google Maps is very good at remembering places and does not describe a way to decide between them. If your list for one city has grown past what you could visit in the days you have, the next step is a shortlist, and the guide to planning a trip on a map walks through cutting it down and giving each cluster a day.
Where a dedicated trip tool helps
Google Maps lists suit people who save places all year and want them in one app. A trip planner suits the narrower job of getting one city's list from "everything" to "the places I will actually go". Pick on the job.
- Stay in Google Maps if you already keep everything there, you want your lists on every device you own, and you are happy to build the day split yourself with one list per day.
- Try a planner with days built in if you want a schedule. The Wanderlog alternatives page compares those tools.
- Try a map-first saver if you collect places from many sources. See the Mapstr alternatives.
- Try NomadSwipe if your problem is deciding. I built it for the step before the map: you swipe through real places in a city, save the ones you like to a trip and see them on a trip map.
For a side-by-side look at apps that do more than Google Maps lists, read Google Maps lists alternatives. For a wider pick, see best trip planner apps in 2026 and swipe travel apps compared.
How saving places works in NomadSwipe
I built NomadSwipe around four verbs: Swipe, Save, Map, Go. Pick a city, and each card shows a place with its category, rating, distance and, where hours are known, whether it is open. Swipe right or press Save and the place goes to the trip. Open the trip and every saved place is pinned on the map, and the list view sorts by rating, distance or A to Z. Custom pins cover anything the cards miss, such as your hotel.
The store listing's sample trip is a long weekend in Lisbon with 16 places, all picked by swiping. The Lisbon in 2 days guide shows what that looks like place by place.
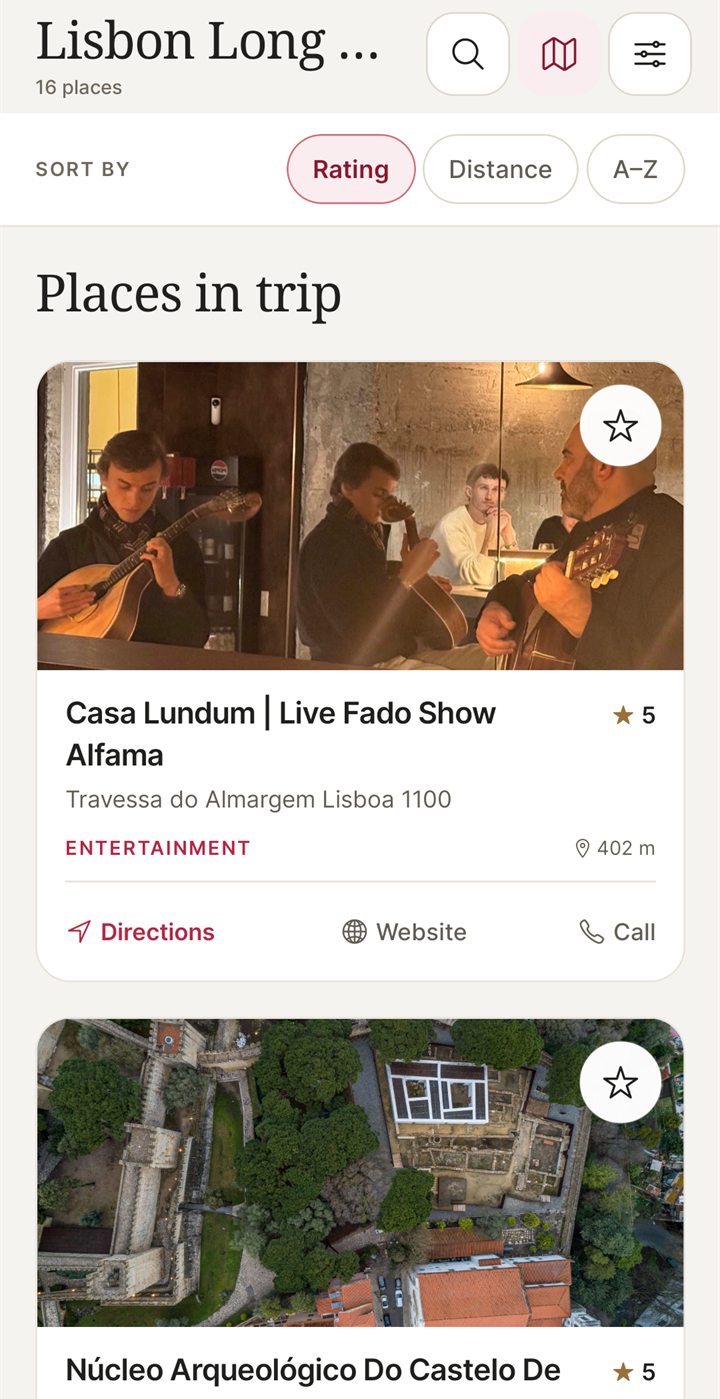
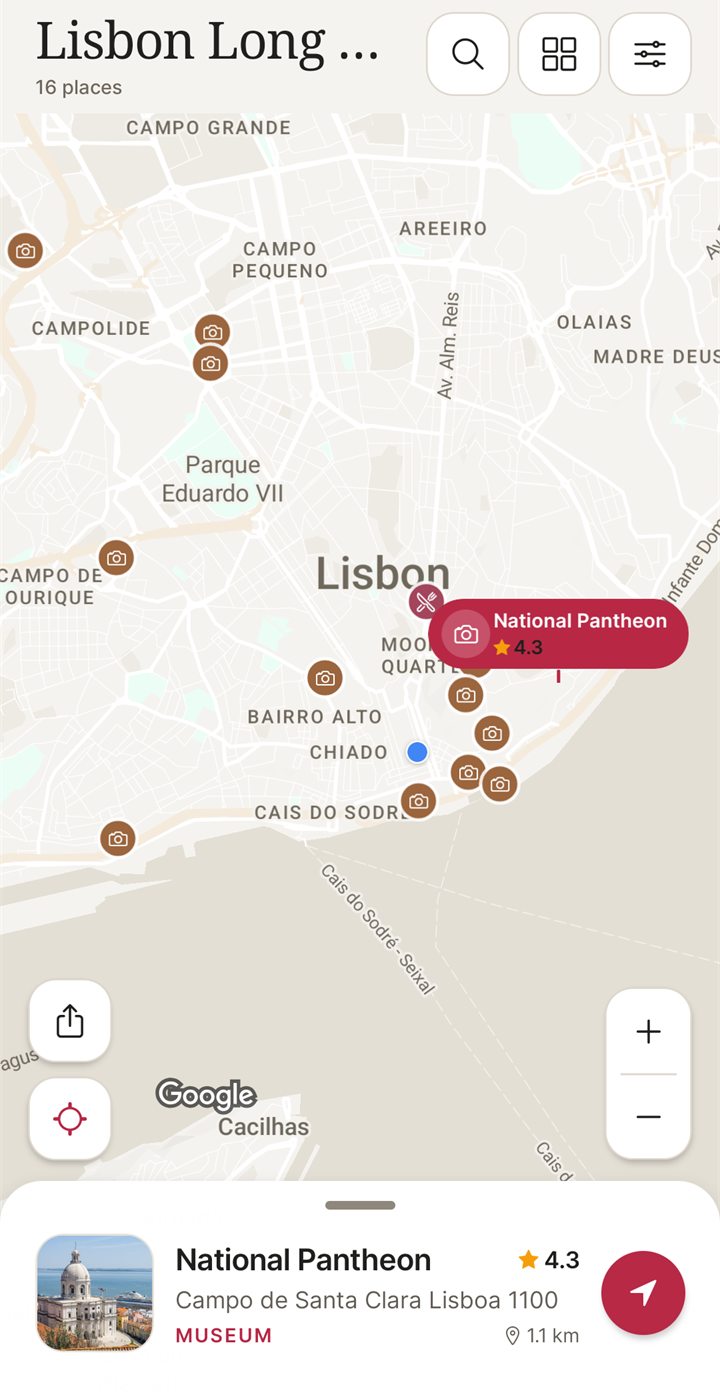
Know the limits before you choose. The free plan covers 3 trips, 2 searched places saved to a trip a month, 2 custom pins a month and a daily limit on saves. Premium, Monthly or Lifetime, removes those limits. Up to 20 saved trips are available offline after you open them online, and offline copies expire. NomadSwipe has no day-by-day scheduler in its listing, so grouping days is still your job. It is Android only today; iPhone is coming soon. If you need an iPhone app now, the Google Maps steps above are the practical route.
Questions about saving places on Google Maps
How do I save a place on Google Maps?
Search for the place or tap it on the map, tap its name or address at the bottom of the screen, tap Save and choose a list. The steps are the same on Android and iPhone.
Where do my saved places go in Google Maps?
Open the You tab and look under Your lists. Each list can be shown or hidden on your main map from the More menu next to it. Labeled places have their own entry under You, then Labeled.
Can I see my saved places offline in Google Maps?
Saving a place is a separate thing from downloading an offline area, according to Google Maps Help. If you need maps without a signal, download the area for the city you are visiting as well as saving the places.
Is there a limit to how many places I can save in a Google Maps list?
Google Maps Help says saved lists are limited to 3,000 entries and that lists with more entries may not display properly.
Is NomadSwipe available on iPhone?
Not yet. NomadSwipe is Android only today, on Google Play. iPhone is coming soon.
Findings
These findings come from reading the Google Maps Help pages for creating a list, saving favorite places, labeling a place and the You tab, for both Android and iPhone where a page existed, on 4 November 2026. The method was to copy each step only if the page listed it, and to mark a step as Android only or iPhone only when the other platform's page did not list it. It is one app's help pages on one day, so treat it as a snapshot.
- Saving a place takes three taps once you have found it, on both platforms: the place's name or address, then Save, then a list.
- The Android and iPhone create-a-list pages differ: only the Android page lists a Private or Shared choice at creation and the Customize list order option, and only the iPhone page lists the note step.
- Google Maps ships five default lists named on the help page: Favorites, Want to go, Starred places, Labeled and Travel plans.
- The help pages describe lists, a main-map switch per list and a 3,000-entry cap, but none of the pages I read describe a day-by-day view or a way to cut a long list down.
Try the shortlist step on your next city
I built NomadSwipe to swipe real places in a city, save the ones you like and see them on a map. It is Android only for now, and iPhone is coming soon.
Sources
- Google Maps Help, create a list of places (Android): support.google.com/maps/answer/7280933
- Google Maps Help, create a list of places (iPhone and iPad): support.google.com/maps/answer/7280933 (iOS)
- Google Maps Help, save favorite places: support.google.com/maps/answer/3184808
- Google Maps Help, give a place a private label: support.google.com/maps/answer/6257830
- Google Maps Help, find your places and lists in the You tab: support.google.com/maps/answer/9948049
- NomadSwipe facts: the public Google Play listing of NomadSwipe: Trip Planner and the Lisbon guide, checked 2 and 3 November 2026.